- 518.348.9000
- [email protected]
- 117 Van Rd Gloversville,NY 12078
Mini Split System Installation: Step-by-Step Expert Guide
Mini Split Systems for Gloversville area homeowners
Installing a mini split system can drastically improve indoor comfort without the need for extensive ductwork. Mini split systems offer an energy-efficient solution for heating and cooling individual rooms or zones. This makes them ideal for homes with limited space or for retrofitting older buildings.
The installation process requires careful planning, proper placement of indoor and outdoor units, and expert handling of refrigerant lines and electrical connections. It’s important to understand each step to ensure optimal performance and efficiency.
By the end of this guide, you will have a detailed roadmap to successfully install a mini split system, tailored to your specific needs. This will help you achieve a comfortable living environment while maximizing energy savings.

518 Red Dragon Service Areas Include :

Amsterdam
Amsterdam Mini Split System Installation

Gloversville
Gloversville Mini Split System Installation

Johnstown
Johnstown Mini Split System Installation

Broadalbin
Broadalbin Mini Split System Installation

Fonda
Fonda Mini Split System Installation
Mayfield
Mayfield Mini Split System Installation
Northville
Northville Mini Split System Installation

Planning and Preparation for mini split installation in the Johnstown area
Proper planning and preparation is essential for a successful mini split system installation. Key steps include evaluating the installation space, choosing the appropriate system, and collecting the necessary tools and materials.
Assessing Installation Space
Begin by evaluating the intended installation area. Check the wall’s structural integrity to support the indoor unit’s weight. Ensure that the mounting location allows for at least 6-12 inches of space around the unit to facilitate airflow.
Verify that there is an accessible exterior wall for the outdoor unit. The distance between the indoor and outdoor units should be minimal to maintain efficiency. Measure the area to ensure the selected mini split model fits well within the space.
Assessing Installation Space Needs For Gloversville Mini Split systems
Begin by evaluating the intended installation area. Check the wall’s structural integrity to support the indoor unit’s weight. Ensure that the mounting location allows for at least 6-12 inches of space around the unit to facilitate airflow.
Verify that there is an accessible exterior wall for the outdoor unit. The distance between the indoor and outdoor units should be minimal to maintain efficiency. Measure the area to ensure the selected mini split model fits well within the space.
Selecting the Right Mini Split System
Choose a mini split system that matches the room’s size and cooling needs. The British Thermal Unit (BTU) rating is crucial; larger rooms require higher BTU ratings. Refer to a BTU sizing chart to determine the appropriate capacity.
Consider additional features such as energy efficiency ratings (EER), noise levels, and smart controls. It’s wise to select a model that balances cost and functionality. Be sure to purchase from reputable manufacturers to ensure reliability and warranty support.
Gathering Necessary Tools and Materials
Gather all tools and materials before starting the installation. Essential tools include a drill, level, screwdriver, and wrench set. You will also need a vacuum pump, manifold gauge set, and refrigerant for system charging.
Additionally, gather mounting brackets, insulation, electrical wiring, and refrigerant lines. Having a detailed checklist and visual guide can streamline the process, ensuring that nothing is overlooked during the installation.
Proper preparation sets the foundation for an efficient and smooth installation process.
Installation Procedurenfor your Johnstown area Mini Split Intsall
Properly installing a mini split system involves several key steps to ensure efficient operation. Each step, from mounting the indoor unit to testing the system, needs careful attention.
Indoor Unit Installation
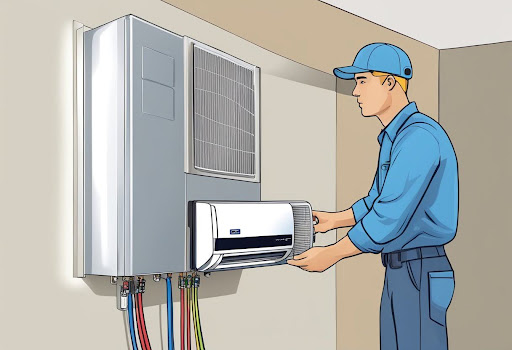
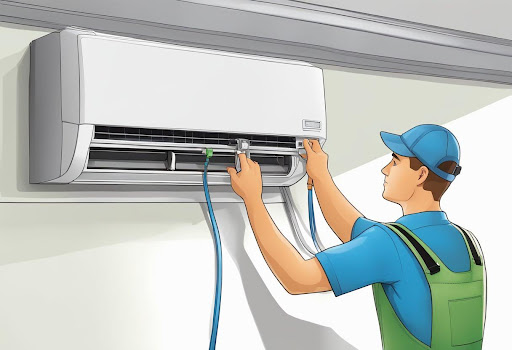
Mount the indoor unit on an interior wall. Position the unit at least 7 feet above the floor and ensure there are no obstructions within 4 feet of it. Use a level to ensure it is straight. Drill a 3-inch hole through the wall for the refrigerant lines, ensuring it slopes downward to the outside.
Anchor the mounting plate securely with screws and wall anchors. Attach the indoor unit to the mounting plate and connect the refrigerant lines, ensuring the connections are tight to prevent leaks. Seal around the hole to prevent air and water ingress.

Outdoor Unit Installation
Select a location for the outdoor unit that provides good airflow and is easy to service. Avoid locations near noise-sensitive areas like bedrooms or neighbor’s windows. Place the unit on a concrete pad or sturdy base to keep it level and stable.
Ensure the outdoor unit is at least 1 foot away from any obstructions and 4 feet from other units. Use anti-vibration pads to minimize noise and vibrations. Connect the refrigerant lines and condensation drain to the outdoor unit, ensuring secure fittings to prevent leaks.
Connecting Refrigerant Lines
Use flare fittings to connect the refrigerant lines. Ensure the flares are clean and free of burrs. Tighten the fittings with a torque wrench to the manufacturer’s specifications to avoid over-tightening or under-tightening.
Insulate the refrigerant lines with foam insulation to prevent heat loss and condensation. Secure the insulation with tape or zip ties. Check for any kinks or sharp bends in the lines, as these can restrict refrigerant flow and reduce system efficiency.
Electrical Wiring and Connections
Turn off the main power supply before starting any electrical work. Connect the indoor and outdoor units to the power source according to the wiring schematic provided by the manufacturer. Use weatherproof conduit and connectors for outdoor wiring to prevent exposure to the elements.
Ensure the electrical connections are secure and comply with local electrical codes. Install a dedicated circuit breaker for the unit to prevent electrical overload. Double-check all electrical connections for tightness and proper insulation.
System Testing and Commissioning
After completing the installation, perform a pressure test to check for refrigerant leaks. Use a vacuum pump to evacuate any air and moisture from the system. Charge the system with the correct amount of refrigerant as specified by the manufacturer.
Turn the system on and test its operation in both cooling and heating modes. Check for correct airflow, temperature control, and any unusual noises. Ensure the system responds to the remote control commands and cycles on and off correctly. Adjust any settings as needed for optimal performance.
WHAT WE DO
Expert HVAC Care, Always.


Residential Installations
Trust us to transform your space into a haven of perfect climate control with our expert HVAC installations.

Commercial Installations
Trust us to transform your space into a haven of perfect climate control with our expert HVAC installations.

Thermostat Installations
Trust us to transform your space into a haven of perfect climate control with our expert HVAC installations.

Air Quality Solutions
Trust us to transform your space into a haven of perfect climate control with our expert HVAC installations.
